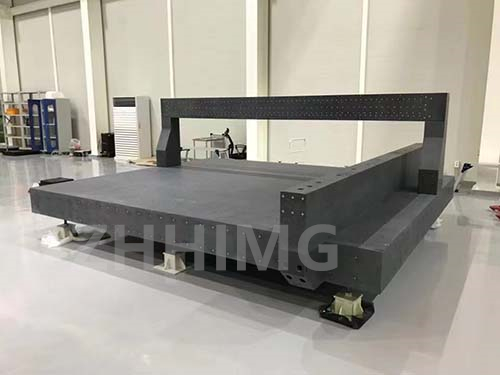
Granite bases are essential components of industrial computed tomography systems, as it provides a stable and flat surface for the system's X-ray detector and the sample being scanned. The assembly, testing, and calibration of the granite base require a careful and thorough process to ensure accurate and reliable results.
Here are the step-by-step instructions on how to assemble, test, and calibrate granite base for industrial computed tomography products.
Assembling the Granite Base:
1. Unpack the granite base and inspect it for any damage or defects. If you find any issues, contact the manufacturer or supplier immediately.
2. Install the leveling feet to ensure that the granite base is stable and flat.
3. Place the X-ray detector mount on top of the granite base, securing it with screws.
4. Install the sample holder, making sure that it is centered and secure.
5. Install any additional accessories or components, such as shielding materials, to complete the assembly.
Testing the Granite Base:
1. Perform a visual inspection of the granite base and all components to ensure that they are properly installed and aligned.
2. Use a precision level to check the flatness of the granite surface. The surface must be level to within 0.003 inches.
3. Perform a vibration test on the granite base to ensure that it is stable and free from any vibrations that could affect the accuracy of the CT scan.
4. Check the clearance around the sample holder and X-ray detector mount to ensure that there is sufficient space for the sample to be scanned and that there is no interference with any of the components.
Calibrating the Granite Base:
1. Use a reference sample of known dimensions and density to calibrate the CT system. The reference sample should be made of a material similar to the one being analyzed.
2. Scan the reference sample with the CT system and analyze the data to determine the CT number calibration factors.
3. Apply the CT number calibration factors to the CT data obtained from other samples to ensure accurate and reliable results.
4. Regularly perform CT number calibration checks to ensure that the system is calibrated and functioning correctly.
In conclusion, the assembly, testing, and calibration of the granite base for industrial computed tomography products require careful attention to detail and precision. Follow the above steps to ensure accurate and reliable results. Remember to regularly check and maintain the system to ensure optimum performance.
Post time: Dec-08-2023

