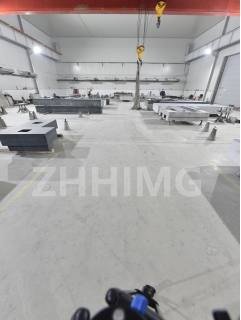
Granite machine bases are a crucial component in the automobile and aerospace industries. They provide stability and precision to the machines used for the production of these products. The assembly, testing, and calibration of these bases require a certain level of skill and attention to detail. In this article, we will go through the process of assembling, testing, and calibrating granite machine bases for the automobile and aerospace industries.
Assembling the Granite Machine Base
Assembling the granite machine base requires precision, accuracy, and patience. The following steps should be followed for a successful assembly:
1. Preparation: Before starting the assembly process, make sure that all the required parts are available. Identify and inspect each part to ensure that they are in good condition and free of any defects or damage. This will help in avoiding any errors during the assembly process.
2. Cleaning: Clean the machine base thoroughly before assembly. Use a dry and clean cloth to wipe off any dust or dirt and ensure that the surface is clean and smooth.
3. Mounting: Mount the granite surface plate on the machine base. Place the surface plate on the base and ensure that it is leveled properly. Use a spirit level to check if the surface plate is leveled.
4. Fastening: Secure the surface plate with bolts and nuts. Tighten the bolts and nuts carefully to avoid over-tightening, which can cause damage to the granite surface plate.
5. Sealing: Seal the bolt heads with epoxy or any other appropriate sealant. This will prevent any moisture or debris from getting inside the bolt holes.
Testing the Granite Machine Base
Once the assembly is complete, the machine base needs to be tested to ensure that it meets the required standards. The following tests should be conducted:
1. Flatness Test: Check the flatness of the granite surface plate using a surface plate comparator. The surface plate should be flat to within at least 0.0005 inches, as per the industry standards.
2. Parallelism Test: Check the parallelism of the granite surface plate to the machine base using a dial indicator. The surface plate should be parallel to the machine base to within at least 0.0005 inches.
3. Stability Test: Check the stability of the machine base by placing a weight on the surface plate and observing any movement or vibrations. Any movements observed should be within the acceptable limits as per industry standards.
Calibrating the Granite Machine Base
Calibration of the granite machine base is necessary to ensure that the machine produces accurate and precise results. The following steps should be followed for calibration:
1. Zero the machine: Set the machine to zero by using a calibration block. This will ensure that the machine produces accurate and precise results.
2. Testing: Conduct various tests on the machine to ensure that it is producing accurate and precise results. Use a dial gauge to measure and record any deviations from the expected results.
3. Adjustment: If any deviations are observed, make the necessary adjustments to the machine. Repeat the tests to ensure that the machine is now producing accurate and precise results.
Conclusion
In conclusion, the assembly, testing, and calibration of granite machine bases for the automobile and aerospace industries are critical to ensure precision and accuracy. The process requires attention to detail and patience to ensure that the base meets the required standards. Follow the steps outlined in this article to ensure a successful assembly, testing, and calibration process and produce accurate and precise products.
Post time: Jan-09-2024

