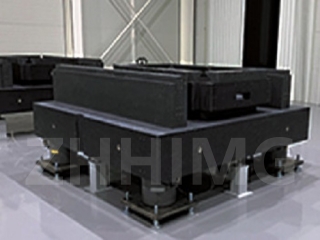
Universal length measuring instruments are precision tools that require a highly accurate and stable base to function properly. Granite machine beds are widely used as stable bases for these instruments due to their excellent rigidity, stiffness, and thermal stability. In this article, we will discuss the steps involved in assembling, testing, and calibrating a granite machine bed for universal length measuring instruments.
Step 1 - Preparation:
Before starting the assembly process, ensure that you have all the necessary tools and equipment. You will need:
- A levelled workbench or table
- A granite machine bed
- Clean lint-free cloths
- A precision level
- A torque wrench
- A dial gauge or laser interferometer system
Step 2 - Assemble the Granite Machine Bed:
The first step is to assemble the granite machine bed. This involves placing the base onto the workbench or table, followed by attaching the top plate to the base using the supplied bolts and fixing screws. Ensure that the top plate is levelled and is secured to the base with the recommended torque settings. Clean the surfaces of the bed to remove any dirt or debris.
Step 3 - Test the Levelness of the Granite Bed:
The next step is to test the levelness of the granite bed. Place the precision level on the top plate and check that it is levelled in both the horizontal and vertical planes. Adjust the levelling screws on the base to achieve the required levelness. Repeat this process until the bed is levelled within the required tolerances.
Step 4 - Check the Flatness of the Granite Bed:
Once the bed is levelled, the next step is to check the flatness of the top plate. Use a dial gauge or a laser interferometer system to measure the flatness of the plate. Check the flatness in multiple locations across the plate. If any high spots or low spots are detected, use a scraper or a surface plate lapping machine to flatten the surfaces.
Step 5 - Calibrate the Granite Bed:
The final step is to calibrate the granite bed. This involves verifying the accuracy of the bed using standard calibration artefacts, such as length bars or gauge blocks. Measure the artefacts using the universal length measuring instrument, and record the readings. Compare the instrument readings with the actual values of the artefacts to determine the accuracy of the instrument.
If the instrument readings are not within the specified tolerances, adjust the instrument's calibration settings until the readings are accurate. Repeat the calibration process until the instrument readings are consistent across multiple artefacts. Once the instrument is calibrated, verify the calibration periodically to ensure ongoing accuracy.
Conclusion:
Assembling, testing, and calibrating a granite machine bed for universal length measuring instruments requires careful attention to detail and a high degree of precision. By following the steps outlined in this article, you can ensure that the granite bed provides a stable and accurate base for your instruments. With a properly calibrated bed, you can perform accurate and reliable measurements of length, ensuring that your products meet the highest quality standards.
Post time: Jan-12-2024

