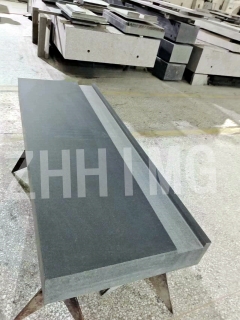
Granite spindles and worktables are important components in the manufacturing of high-precision machine tools, measuring instruments, and other industrial equipment. They play a critical role in ensuring the accuracy and stability of these machines, which is crucial for meeting the exacting requirements of modern industries. However, the accuracy and stability of granite spindles and worktables can be affected by various factors, including manufacturing defects, material properties, and environmental conditions. Therefore, it is essential to take appropriate measures to ensure their quality and reliability.
One effective way to ensure the accuracy and stability of granite spindles and worktables is to use a coordinate measuring machine (CMM) for inspection and verification. A CMM is a high-precision measuring instrument that can provide accurate and reliable measurements of complex three-dimensional objects with sub-micron-level accuracy. By using a CMM to measure and verify the dimensions, tolerances, and geometric features of granite spindles and worktables, manufacturers can detect any deviations or defects and take corrective actions.
When using a CMM to measure granite components, it is critical to take several factors into account to ensure accurate and reliable results. First, the CMM should be calibrated and verified regularly to ensure its accuracy and stability. This can be achieved by performing a traceable calibration of the CMM according to international standards, such as ISO 10360. Second, the measurement process should be carefully planned and executed to avoid measurement errors and ensure repeatability. This includes selecting appropriate measurement strategies, setting up suitable measurement probes, and choosing the correct reference frames and coordinate systems.
Another important aspect of ensuring the quality of granite spindles and worktables is to control the manufacturing process carefully. This involves using high-quality raw materials, such as high-purity granites with low thermal expansion coefficients and good mechanical stability, and using advanced manufacturing techniques, such as precision grinding, lapping, and polishing. Manufacturers should also take measures to avoid structural defects, such as cracks, voids, and inclusions, that could affect the stability and mechanical properties of the granite components.
Environmental conditions can also affect the accuracy and stability of granite components. For instance, temperature fluctuations can cause thermal expansion or contraction of the granite, leading to dimensional changes and deformation. To minimize the effects of thermal instability, manufacturers can adopt various measures, such as installing temperature-stabilized enclosures, using thermal compensation techniques, and minimizing heat sources in the vicinity of the granite machine components. Similarly, humidity variations can cause dimensional changes due to moisture absorption or desorption. To avoid this, manufacturers can store and use granite components in a controlled humidity environment.
In conclusion, ensuring the accuracy and stability of granite spindles and worktables is crucial for achieving high precision and reliability in modern manufacturing processes. By using advanced measuring and inspection techniques, controlling the manufacturing process, and minimizing the effects of environmental conditions, manufacturers can produce high-quality granite components that meet the most stringent requirements of the industry.
Post time: Apr-09-2024

