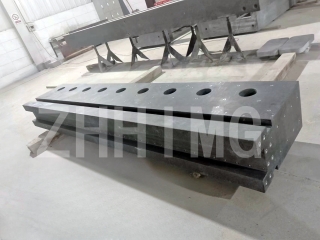
CMM (coordinate measuring machine) is an essential tool used for measuring the accuracy of complex geometric parts in various industries such as automotive, aerospace, and medical. To ensure precise and consistent measuring results, the CMM machine must be equipped with high-quality granite components that provide stable and rigid support to the measuring probes.
Granite is an ideal material for CMM components because of its high precision, low thermal expansion coefficient, and excellent stability. However, like any other material, granite can also wear out over time due to constant use, environmental factors, and other factors. Therefore, it is essential to evaluate the wear degree of granite components and replace them when necessary to ensure the accuracy and reliability of CMM measurements.
One of the primary factors that affect the wear of granite components is the frequency of use. The more frequently a granite component is used, the more likely it is to wear out. When evaluating the wear degree of granite components in a CMM, it is essential to consider the number of measuring cycles, the frequency of use, the force applied during measurements, and the size of the measuring probes. If the granite is used for a prolonged period and shows signs of damage, such as cracks, chips, or visible wear, it is time to replace the component.
Another significant factor that affects the wear of granite components is the environmental conditions. CMM machines are usually located in temperature-controlled metrology rooms to maintain a stable environment for precise measuring. However, even in temperature-controlled rooms, humidity, dust, and other environmental factors can still affect the wear of the granite components. Granite is susceptible to water absorption and can develop cracks or chips when exposed to moisture for prolonged periods. Therefore, it is essential to keep the environment in the metrology room clean, dry, and free from debris that can damage the granite components.
To ensure accurate measurements, it is necessary to regularly check the condition of the granite components and determine if they need to be replaced. For instance, inspection of the granite surface to see if it has cracks, chips or visible worn areas suggest that the component needs replacing. There are various methods to evaluate the wear degree of granite components in a CMM. A common and straightforward method is to use a straight edge to check for flatness and wear. When using a straight edge, pay attention to the number of points where the edge contacts the granite, and check for any gaps or rough areas along the surface. A micrometer can also be used to measure the thickness of the granite components and determine if any part has worn out or eroded.
In conclusion, the condition of granite components in a CMM machine is crucial for ensuring precise and accurate measurements. It is essential to evaluate the wear degree of granite components regularly and replace them when necessary. By keeping the environment in the metrology room clean, dry, and free from debris, and watching for visible signs of wear, CMM operators can ensure the longevity of their granite components and maintain the accuracy and reliability of their measuring equipment.
Post time: Apr-09-2024

