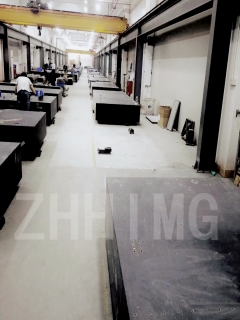
The Coordinate Measuring Machine (CMM) is an incredible machine that is used for precision measurements. It is widely used across various industries, such as aerospace, automotive, medical, and others, for measuring large and complex equipment, molds, dies, intricate machine parts, and more.
One of the most important components of a CMM is the granite structure. Granite, being a highly stable and dimensionally stable material, provides an excellent foundation for the delicate measuring platform. The granite components are carefully machined to precise tolerances to ensure a stable and accurate surface for accurate measurements.
After a granitic component is fabricated, it needs to undergo a maintenance and calibration cycle regularly. This helps the granite component to maintain its original structure and stability over time. For a CMM to perform highly precise measurements, it needs to be maintained and calibrated to ensure an accurate measurement system.
Determining the maintenance and calibration cycle of the granite components of a CMM includes several steps:
1. Routine maintenance: The maintenance process begins with a daily inspection of the granite structure, mainly to check for any signs of wear and damage on the granite surface. If issues are identified, there are various polishing and cleaning techniques that can be used to restore the accuracy of the granite surface.
2. Calibration: Once the routine maintenance is completed, the next step is the calibration of the CMM machine. Calibration involves the use of specialized software and equipment to measure the machine’s actual performance against its expected performance. Any discrepancies are adjusted accordingly.
3. Inspection: An inspection is a critical step in the maintenance and calibration cycle of a CMM machine. A skilled technician performs a thorough inspection of the granite components to check for any signs of wear and tear or damage. Such inspections help to eliminate any potential issues that might affect the accuracy of the machine's measurements.
4. Cleaning: After inspection, the granite components are thoroughly cleaned to remove any dirt, debris, and other contaminants that may have accumulated on the surface.
5. Replacement: Lastly, if a granite component has reached its end of life, it is important to replace it to maintain the accuracy of the CMM machine. Various factors must be considered when determining the replacement cycle of granite components, including the number of measurements taken, the type of work performed on the machine, and more.
In conclusion, the maintenance and calibration cycle of a CMM machine's granite components are vital to maintain the accuracy of measurements and ensure the longevity of the machine. As industries rely on CMM measurements for everything from quality control to R&D, precision measurements’ accuracy is crucial in ensuring high-quality and reliable products. Therefore, by following a standardized maintenance and calibration schedule, the machine can provide accurate measurements for years to come.
Post time: Apr-09-2024

