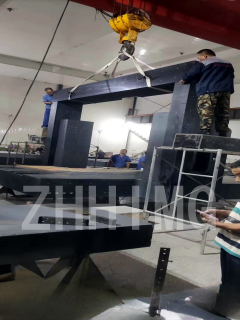
Precision granite is an essential tool for the semiconductor and solar industries. It is used to provide a flat, level, and stable surface for the inspection and calibration of measuring equipment and other precision instruments. Assembling, testing, and calibrating precision granite require careful attention to detail and a dedicated approach. In this article, we will outline the steps necessary to assemble, test, and calibrate precision granite for use in the semiconductor and solar industries.
Assembling the Precision Granite
The first step in assembling precision granite is to make sure that all the parts are present and that they are undamaged. The granite should be free from any cracks or chips. The following tools and materials are required for assembling the precision granite:
• Granite Surface Plate
• Leveling Screws
• Leveling Pads
• Spirit Level
• Spanner Wrench
• Cleaning Cloth
Step 1: Place the Granite on a Level Surface
The granite surface plate should be placed on a level surface, such as a workbench or table.
Step 2: Attach the Leveling Screws and Pads
Attach the leveling screws and pads to the underside of the granite surface plate. Make sure they are level and secure.
Step 3: Level the Granite Surface Plate
Use a spirit level to level the granite surface plate. Adjust the leveling screws as necessary until the surface plate is level in all directions.
Step 4: Tighten the Spanner Wrench
The spanner wrench should be used to tighten the leveling screws and pads securely to the granite surface plate.
Testing the Precision Granite
After assembling the precision granite, it is important to test it to ensure that it is flat and level. The following steps are required for testing the precision granite:
Step 1: Clean the Surface Plate
The surface plate should be cleaned with a soft, lint-free cloth before testing. This will help to remove any dust, debris, or other particles that could impact the accuracy of the testing.
Step 2: Perform a Tape Test
A tape test can be used to test the flatness of the surface plate. To perform a tape test, a piece of tape is placed on the surface of the granite plate. The air gap between the tape and the surface plate is measured at various points using a feeler gauge. The measurements should be within the tolerances required by the industry standards.
Step 3: Verify Surface Plate Straightness
The straightness of the surface plate can be checked with a straight-edge tool placed along the edge of the surface plate. A light source is then shone behind the straight edge to check for any light passing through behind it. The straightness should fall within the industry standards.
Calibrating the Precision Granite
Calibrating the precision granite involves aligning and adjusting the equipment to ensure an accurate and repeatable measurement. The following steps should be followed to calibrate the precision granite:
Step 1: Verify Leveling
The levelness of the precision granite should be verified before calibration. This will ensure that the equipment is properly aligned and ready for calibration.
Step 2: Perform a Test of Measuring Devices
The precision granite can be used to test and calibrate other measuring devices such as micrometers and calipers. This will help ensure that they are accurate and reliable, and that they are within the tolerances required by the industry standards.
Step 3: Verify Flatness
The flatness of the surface plate should be checked regularly to ensure that it is within industry standards. This will ensure that all measurements taken on the surface plate are accurate and repeatable.
In conclusion, assembling, testing, and calibrating precision granite requires a meticulous approach and attention to detail. By carefully following the steps outlined in this article, you can ensure that your precision granite equipment is accurate, reliable, and ready to meet the demanding needs of the semiconductor and solar industries.
Post time: Jan-11-2024

