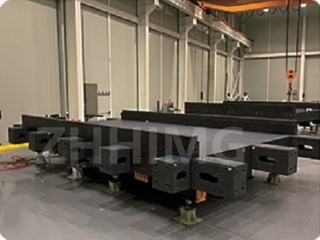
Precision granite components are essential in various industries, including manufacturing, automotive, and aerospace. The installation of these components may seem simple, but it requires a high level of skill and precision. In this article, we will discuss the installation process of precision granite components.
Step 1: Prepare the Installation Area
Before installing the precision granite component, it is essential to ensure that the installation area is clean, dry, and free from debris or obstructions. Any dirt or debris on the installation surface can cause unevenness, which may affect the accuracy of the component. The installation area should also be level and stable.
Step 2: Inspect the Precision Granite Component
Before installing the granite component, it is crucial to inspect it thoroughly for any damage or defects. Check for any cracks, chips, or scratches that may affect the accuracy of the component. If you notice any defects, do not install the component and contact your supplier for a replacement.
Step 3: Apply Grout
To ensure that the granite component is securely and accurately installed, a layer of grout should be applied to the installation area. The grout helps to level the surface and provides a stable base for the granite component. Epoxy-based grout is commonly used in precision applications due to its high bond strength and resistance to chemicals and temperature changes.
Step 4: Place the Granite Component
Carefully place the granite component on top of the grout. Ensure that the component is level and positioned correctly according to the installation instructions. It is essential to handle the granite component with care to prevent any damage or scratches.
Step 5: Apply Pressure and Allow to Cure
Once the granite component is in position, apply pressure to ensure that it is securely in place. The component may need to be clamped or held down to ensure that it does not move during the curing process. Allow the grout to cure according to the manufacturer's instructions before removing any clamps or pressure.
Step 6: Perform Final Checks
After the grout has cured, perform a final check to ensure that the granite component is level and secure. Check for any cracks or defects that may have occurred during the installation process. If any issues are present, contact your supplier for further assistance.
In conclusion, the installation process of precision granite components requires attention to detail and precision. By following the steps outlined above, you can ensure that your granite component is installed correctly and accurately. Remember to handle the component with care to prevent any damage or scratches, inspect it thoroughly before installation, and follow the manufacturer's instructions for grout curing time. With proper installation and maintenance, precision granite components can provide accurate and reliable service for years to come.
Post time: Feb-23-2024

